
All photos by Mini’s Memories. You can contact her through Instagram or X.


All photos by Mini’s Memories. You can contact her through Instagram or X.

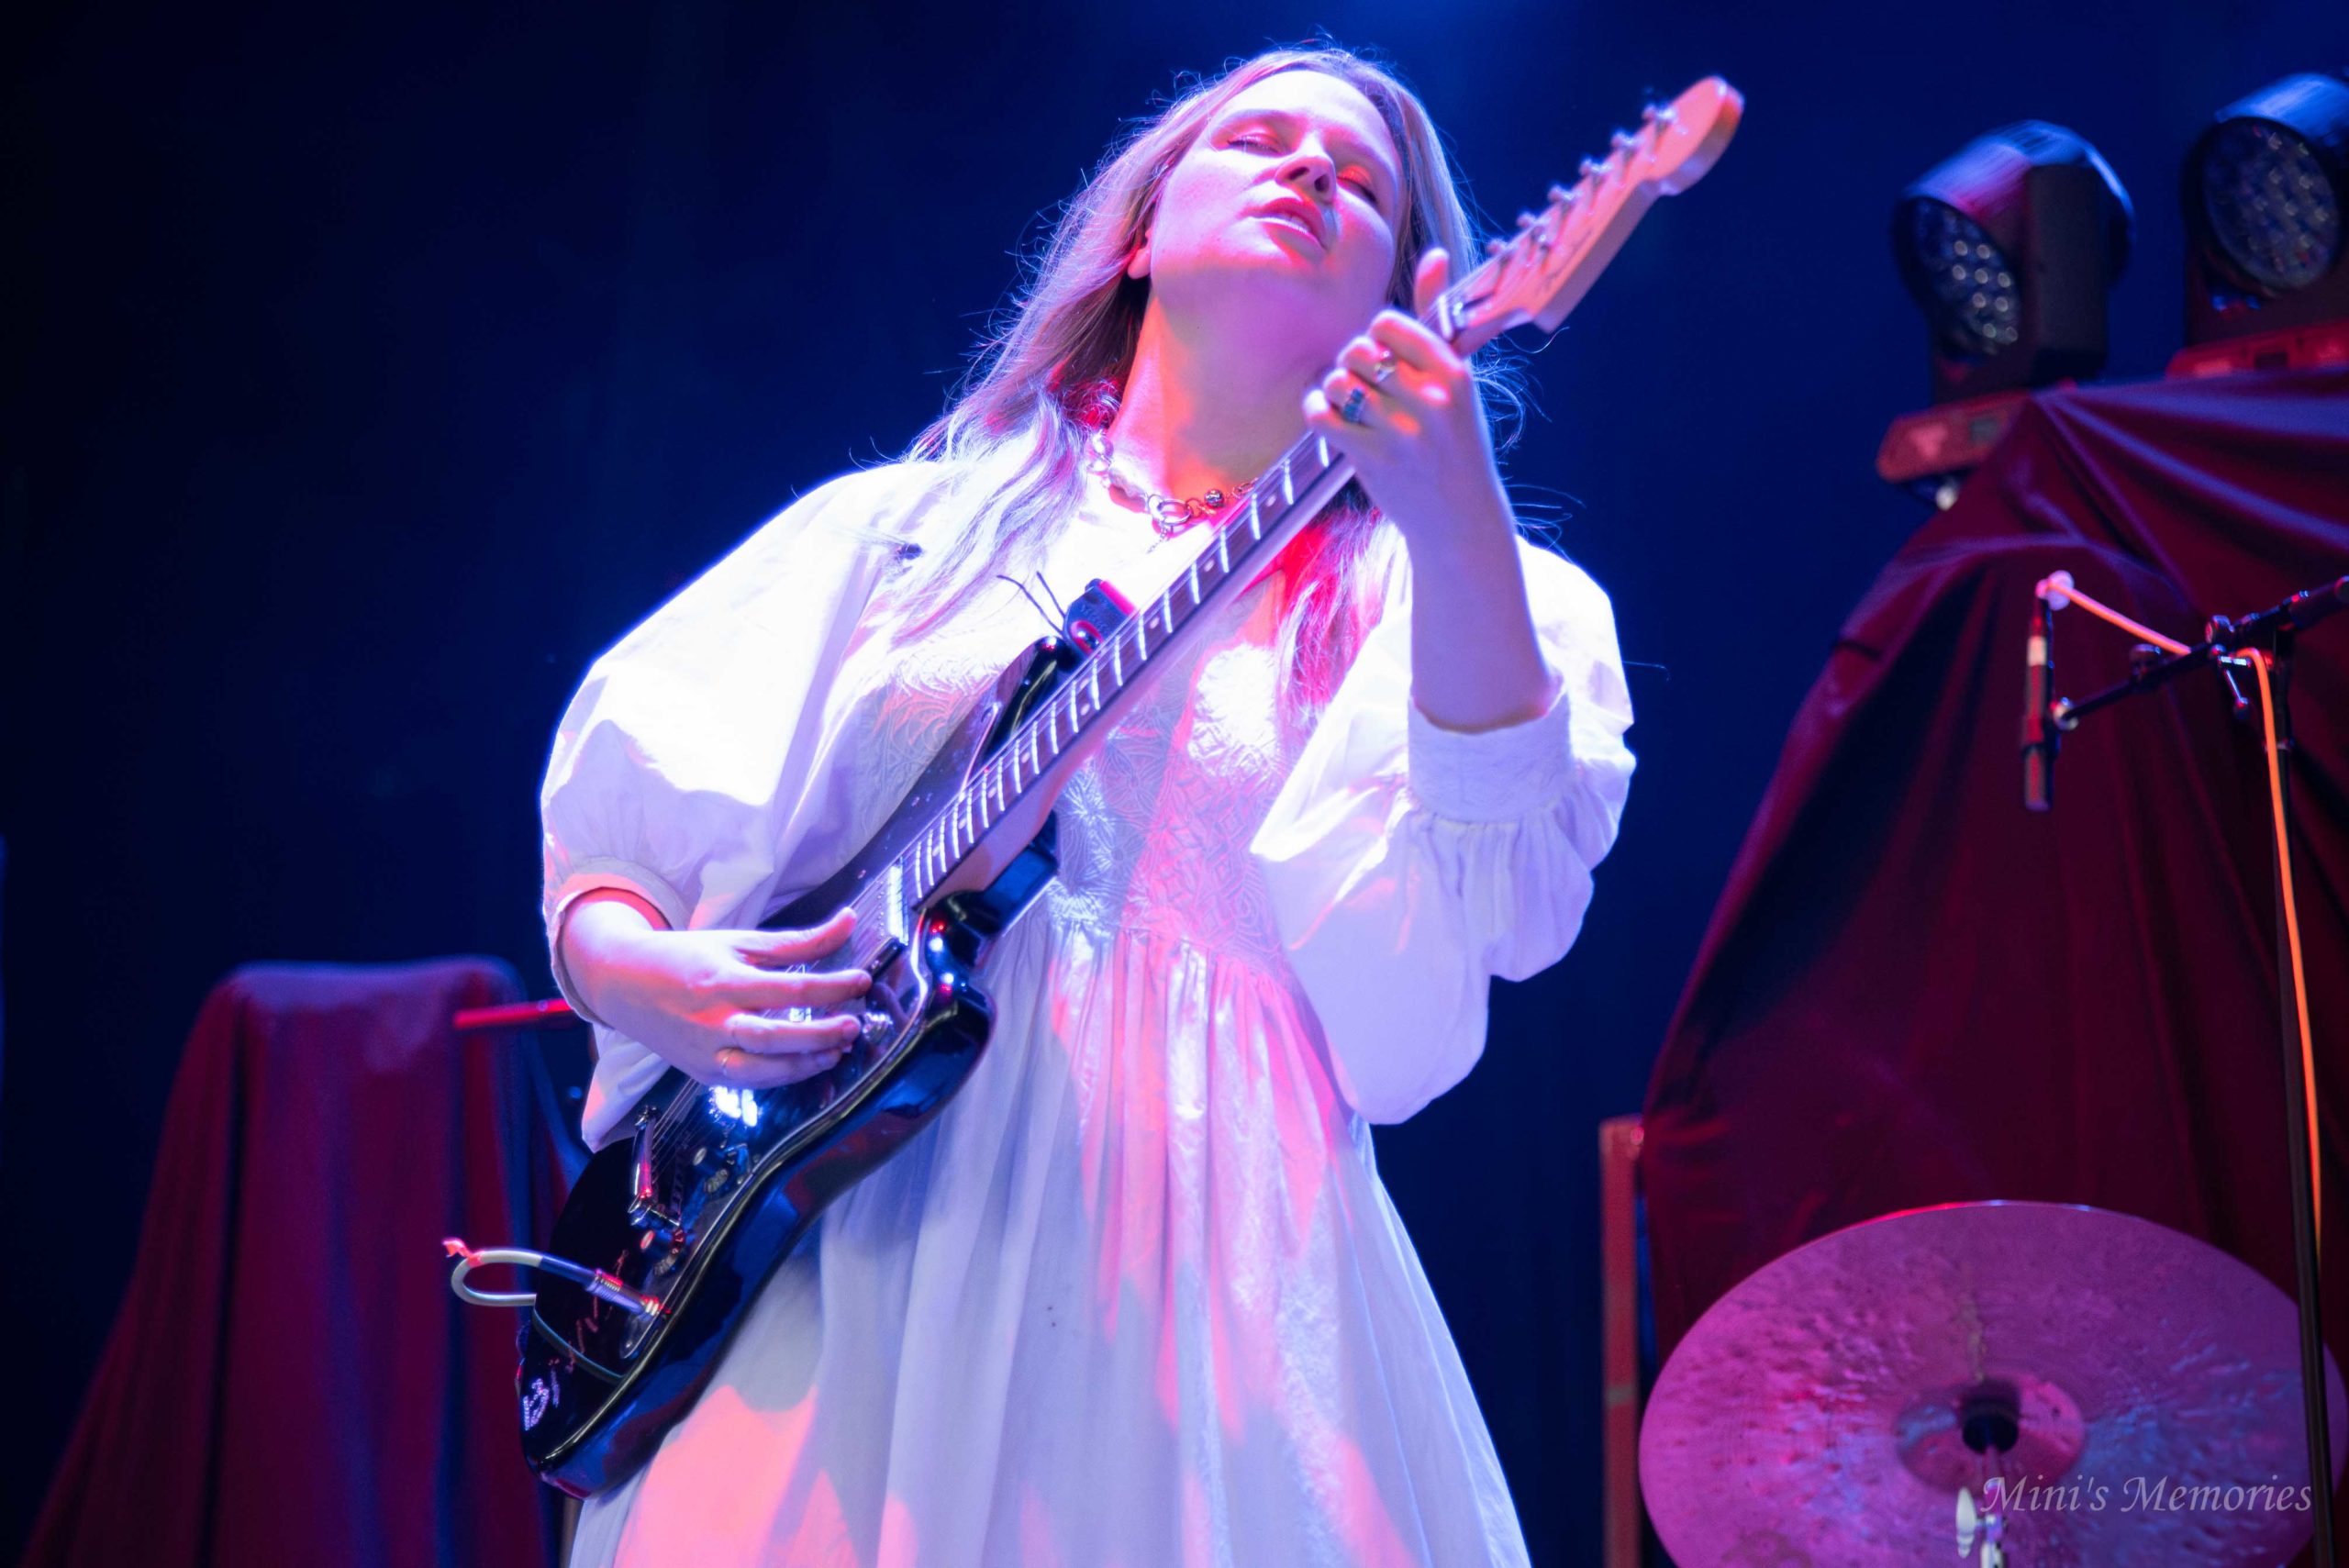
Breakout vocalist and songwriter Lauren Spencer Smith’s highly anticipated sophomore album, THE ART OF BEING A MESS, is out now on Island Records/Republic Records/Unviersal Music Canada. Get it HERE and listen to “Looking Up” HERE.
“THE ART OF BEING A MESS is about embracing the highs and lows, the chaos and the beauty in feeling everything, no matter what the emotion is,” Spencer Smith explains, “Life gets messy, and it’s okay to be angry, sad, confused—or even unsure of what you’re feeling at all. I want this album to feel like a guidebook, helping you understand your own emotions and feeling okay to embrace the journey they take you on.”
Leading up to the release, she has shared “bridesmaid” and “IF KARMA DOESN’T GET YOU (I WILL),” from the LP, the latter of which landed on Spotify’s U.S. Viral Chart. Vinyl, CDs and signed products are available via her online store HERE.
This fall, she will tour Europe, U.K., Australia, and New Zealand, beginning September 3 in Madrid and including stops in Paris, London, Berlin, Dublin, Glasgow, and more—with nearly 90,000 tickets already sold. In February 2026, she’ll return for a 32-date North American headline tour with stops in New York City, Los Angeles, Chicago, Nashville, Atlanta, Philadelphia, Austin, and more. See below for a complete list of dates. Tickets and more information HERE.
True to its name, THE ART OF BEING A MESS captures the emotional rollercoaster Spencer Smith experienced while writing her second album. Each song taps into a feeling—anger, devastation, love, peace, confusion, and everything in between, sometimes all at once. Reflecting on the chaos of being human, each song finds Spencer Smith revisiting real stories and experiences in her life. With this album, she reminds listeners to embrace and feel comfortable with their emotions, recognizing that not everything is black and white.
THE ART OF BEING A MESS follows her debut album, Mirror (2023), which features the RIAA Certified Platinum singles “Flowers” and “Fingers Crossed”—the latter of which peaked at #19 on the Billboard Hot 100 and has reached over 875 million global streams.
From a small town on Vancouver Island, Spencer Smith began her musical journey in 2019, garnering a sizable online audience. Through her music, she explored breakups, complex feelings about school, family, and friends. Spencer Smith has performed at the MTV Video Music Awards, The Tonight Show Starring Jimmy Fallon, and the People’s Choice Awards, where she was also a Best New Artist nominee.
TRACK LIST
LAUREN SPENCER SMITH – THE ART OF BEING A MESS
1. What a beautiful day
2. Sticks & Stones
3. bridesmaid
4. Lighting the flame
5. parallel universe
6. IF KARMA DOESN’T GET YOU (I WILL)
7. things you never say
8. Long Story Short
9. WORSE
10. Pray
11. Looking Up
12. Someday
LAUREN SPENCER SMITH LIVE
July 3—Calgary, AB—Calgary Stampede
September 3—Madrid, ES—Sala La Riviera
September 4—Barcelona, ES—Razzmatazz
September 6—Brussels, BE—Ancienne Belgique
September 7—Brussels, BE—Ancienne Belgique
September 9—Amsterdam, NL—AFAS Live
September 10—Hamburg, DE—Inselpark Arena
September 12—Stockholm, SE—Fållan
September 13—Copenhagen, DK—KB Hallen
September 14—Oslo, NO—Sentrum Scene
September 17—Berlin, DE—Columbiahalle
September 19—Prague, CZ—SaSaZu
September 20—Vienna, AT—Gasometer
September 22—Munich, DE—Tonhalle
September 23—Zurich, CH—X-Tra
September 25—Oberhausen, DE—Turbinenhalle 1
September 26—Paris, FR—Bataclan
September 29—Dublin, IE—National Stadium
September 30—Belfast, UK —Ulster Hall
October 2—London, UK—Eventim Apollo
October 3—Liverpool, UK—Olympia
October 5—Glasgow, UK—O2 Academy
October 6—Glasgow, UK—O2 Academy
October 8—Manchester, UK—O2 Victoria Warehouse
October 9—Leeds, UK—O2 Academy
October 10—Newcastle, UK—O2 City Hall
October 12—Birmingham, UK—O2 Academy
October 13—Bristol, UK—Beacon
November 2—Auckland, NZ—Town Hall
November 4—Sydney, AU—Hordern Pavilion
November 6—Brisbane, AU—The Fortitude Music Hall
November 7—Melbourne, AU—Festival Hall
November 8—Adelaide, AU—Hindley Street Music Hall
November 10—Perth, AU—Astor Theatre
February 4—Nashville, TN—Ryman Auditorium
February 6—Dallas, TX—South Side Ballroom
February 7—Austin, TX—ACL Live – Moody Theatre
February 9—Houston, TX—House of Blues
February 10—New Orleans, LA—The Fillmore
February 12—Orlando, FL—House of Blues
February 13—Atlanta, GA—The Tabernacle
February 14—Charlotte, NC—The Fillmore
February 17—Silver Springs, MD—The Fillmore
February 18—Philadelphia, PA—The Fillmore
February 20—Brooklyn, NY—Brooklyn Paramount
February 21—Boston, MA—Citizens House of Blues
February 22—Ottawa, ON—Bronson Centre
February 24—Montreal, QC—MTELUS
February 25—Toronto, ON—HISTORY
February 26—Toronto, ON—HISTORY
February 28—Detroit, MI—The Fillmore
March 2—Indianapolis, IN—Egyptian Room at Old National Centre
March 3—Chicago, IL—Byline Bank Aragon Ballroom
March 4—Madison, WI—The Sylvee
March 6—Kansas City, MO—Uptown Theater
March 7—Minneapolis, MN—The Fillmore
March 10—Denver, CO—The Fillmore
March 11—Salt Lake City, UT—The Union
March 13—Phoenix, AZ—The Van Buren
March 14—Anaheim, CA—House of Blues
March 17—Los Angeles, CA—The Wiltern
March 18—San Francisco, CA—The Masonic
March 19—Sacramento, CA—Ace of Spades
March 21—Portland, OR—Roseland Theatre
March 22—Vancouver, BC—The Orpheum
March 23—Seattle, WA—Moore Theatre

Today Lorde has released her highly anticipated fourth studio album ‘Virgin’. You can listen HERE.
Following a string of successful singles — ‘What Was That,’ ‘Man of the Year,’ and ‘Hammer’ — which have been steadily climbing the charts and are nearing 200 million streams even before the album’s release, the next step in Lorde’s artistic evolution has arrived. Co-produced by Lorde and Jim-E Stack, Lorde celebrated the release at Baby’s All Right in New York on Sunday – giving fans a sneak preview of the record.
In support of ‘Virgin’, Lorde will be embarking on her biggest tour yet, UltraSound, which has already sold out multiple nights at iconic venues including Madison Square Garden, London’s O2 Arena, and Kia Forum. Demand has been so overwhelming that additional dates were added within hours of the artist presale – many of which also sold out instantly – including 2 nights at Barclay’s Center.
Tracklist for ‘Virgin’
1. Hammer
2. What Was That
3. Shapeshifter
4. Man Of The Year
5. Favourite Daughter
6. Current Affairs
7. Clearblue
8. GRWM
9. Broken Glass
10. If She Could See Me Now
11. David
LORDE ULTRASOUND 2025 TOUR DATES:
SOLD OUT Wednesday, September 17, 2025 – Austin, TX – Moody Center !*
SOLD OUT Friday, September 19, 2025 – Chicago, IL – United Center !*
SOLD OUT Saturday, September 20, 2025 – Nashville, TN – The Pinnacle !*
SOLD OUT Sunday, September 21, 2025 – Nashville, TN – The Pinnacle !*
SOLD OUT Tuesday, September 23, 2025 – Columbus, OH – Schottenstein Center !*
SOLD OUT Wednesday, September 24, 2025 – Toronto, ON – Scotiabank Arena !*
SOLD OUT Friday, September 26, 2025 – Boston, MA – TD Garden =!
SOLD OUT Saturday, September 27, 2025 – Montreal, QC – Bell Centre =!
SOLD OUT Tuesday, September 30, 2025 – Philadelphia, PA – Wells Fargo Center =!
SOLD OUT Wednesday, October 1, 2025 – New York, NY – Madison Square Garden !*
SOLD OUT Friday, October 3, 2025 – Pittsburgh, PA – Petersen Events Center !*
SOLD OUT Saturday, October 4, 2025 – Washington, DC – The Anthem !*
SOLD OUT Sunday, October 5, 2025 – Washington, DC – The Anthem !*
SOLD OUT Tuesday, October 7, 2025 – Duluth, GA – Gas South Arena !^
SOLD OUT Thursday, October 9, 2025 – St. Louis, MO – Chaifetz Arena !^
SOLD OUT Friday, October 10, 2025 – Milwaukee, WI – UW-Milwaukee Panther Arena !^
SOLD OUT Saturday, October 11, 2025 – Minneapolis, MN – Armory !^
SOLD OUT Sunday, October 12, 2025 – Minneapolis, MN – Armory !^
SOLD OUT Tuesday, October 14, 2025 – Morrison, CO – Red Rocks Amphitheatre =!
SOLD OUT Friday, October 17, 2025 – Las Vegas, NV – MGM Grand Garden Arena =!
SOLD OUT Saturday, October 18, 2025 – Inglewood, CA – Kia Forum =!^
SOLD OUT Sunday, October 19, 2025 – Berkeley, CA – The Greek Theatre !^
SOLD OUT Tuesday, October 21, 2025 – Portland, OR – Moda Center !^
SOLD OUT Wednesday, October 22, 2025 – Seattle, WA – Climate Pledge Arena !^
SOLD OUT Sunday, November 9, 2025 – Luxembourg – Rockhal $
SOLD OUT Monday, November 10, 2025 – Paris, France – Zénith de Paris – La Villette %
SOLD OUT Saturday, November 15, 2025 – Manchester, UK – AO Arena =%
SOLD OUT Sunday, November 16, 2025 – London, UK – O2 Arena &%
SOLD OUT Monday, November 17, 2025 – London, UK – O2 Arena &%
SOLD OUT Wednesday, November 19, 2025 – Glasgow, UK – OVO Hydro &%
Thursday, November 20, 2025 – Birmingham, UK – Utilitia Arena &%
SOLD OUT Saturday, November 22, 2025 – Dublin, IE – RDS Simmonscourt &%
SOLD OUT Monday, November 24, 2025 – Amsterdam, Netherlands – AFAS Live &
SOLD OUT Tuesday, November 25, 2025 – Amsterdam, Netherlands – AFAS Live &
SOLD OUT Thursday, November 27, 2025 – Brussels, Belgium – Forest National !
SOLD OUT Saturday, November 29, 2025 – Bologna, Italy – Unipol Arena !
SOLD OUT Sunday, November 30, 2025 – Zurich, Switzerland – Halle 622 !
SOLD OUT Monday, December 1, 2025 – Munich, Germany – Zenith !
SOLD OUT Wednesday, December 3, 2025 – Cologne, Germany – Palladium !l
SOLD OUT Friday, December 5, 2025 – Berlin, Germany – Max-Schmeling-Halle !
Saturday, December 6, 2025 – Lodz, Poland – Atlas Arena !
Monday, December 8, 2025 – Copenhagen, Denmark – Royal Arena !
SOLD OUT Tuesday, December 9, 2025 – Stockholm, Sweden – Annexet !
SOLD OUT Tuesday, December 16, 2025 – Brooklyn, NY – Barclays Center
SOLD OUT Wednesday, December 17, 2025 – Brooklyn, NY – Barclays Center
SUPPORT KEY
= Blood Orange
! Japanese House
& Nilüfer Yana
*Chanel Beads
^Empress Of
% Jim-E Stack
$ Oklou
By Mitch Rice
Urban living offers energy, opportunity, and endless movement — but it also brings packed public transport, unpredictable traffic, and little to no storage space. For millions of modern commuters, the answer is no longer a car or even a scooter. It’s the folding electric bike.
Compact, versatile, and surprisingly powerful, these smart two-wheelers are redefining how people travel through cities. Whether you’re rushing to the office, heading to class, or meeting friends across town, a fe-bike (folding electric bike) could be the commuter upgrade you didn’t know you needed.
Why Are Folding Electric Bikes So Popular?
The rise of e-bikes is no longer a trend — it’s a shift. In cities like New York, Los Angeles, and Chicago, more and more commuters are turning to electric bikes as a practical alternative to cars and buses. Among all e-bikes, folding models quickly stand out for one big reason: flexibility.
They fold in seconds. They fit in elevators, under desks, and even on trains during rush hour. You don’t need a garage, and you won’t waste time circling for parking. If your lifestyle involves stairs, tight corners, or shared storage space, the portability of a fe-bike makes a big difference.
There’s a misconception that folding e-bikes sacrifice power or comfort — but that couldn’t be further from the truth.
Most modern folding e-bikes offer:
Whether you’re commuting 5 miles or 15, a well-equipped fe-bike makes the ride feel shorter, faster, and more enjoyable.
Urban Use Cases: Who Benefits Most from a Folding E-Bike?
Apartment dwellers
No need for outdoor storage. Fold your bike and keep it next to the coat rack.
Mixed-mode commuters
Combine bike + train + walk. A folded fe-bike is welcome on most transit systems.
Delivery riders
Quick start, quick stop, zero fuel. Easy to fold up between jobs or carry upstairs.
Parents or students
Perfect for campus commuting or school runs — no license or insurance required.
No matter your day-to-day routine, the folding electric bike adapts to your pace and priorities.
Compared to owning a car, or even using ride-share daily, an e-bike is more affordable, more agile, and frankly, more fun.
What to Look for in a Folding Electric Bike
If you’re shopping for your first fe-bike, consider the following:
Some models even come with smartphone apps, anti-theft locks, or cruise control — perfect for tech-savvy riders.
If you’re looking for a folding electric bike that balances rugged power with urban utility, the Fiido M1 Pro is one of the most compelling choices available.
Here’s why it stands out:
Fat tires + folding frame = all-terrain versatility
Unlike many city-only folding bikes, the Fiido M1 Pro comes equipped with 20″ x 4″ fat tires, meaning you can ride across gravel, grass, sand, or city streets with equal ease. It’s a great option if your commute includes mixed terrain — or if you want a bike that’s just as ready for weekend trails as weekday office runs.
Long-range battery
With a 250W 55Nm motor and a 48V 12.8Ah battery, it offers up to 54.45 miles of range in pedal-assist mode. That’s more than enough for several days of commuting on a single charge.
Full suspension & 7-speed gears
The M1 Pro offers both front and rear suspension, absorbing bumps and making your ride smoother. Its Shimano 7-speed gears let you adjust to different inclines or riding styles with ease.
Foldable for storage
Despite its fat-tire build, the M1 Pro folds down conveniently, allowing you to tuck it away at home or transport it in an SUV or van.
Whether you’re looking for comfort, performance, or versatility, the Fiido M1 Pro gives you a folding electric bike that doesn’t compromise — on power, design, or range.
Is a folding E-Bike Right for you?
Ask yourself:
If you said yes to most of the above, a fe-bike could quickly become your favorite new companion.
Smart Buying Tips for First-Time E-Bike Owners
Conclusion: A Smarter Way to Move Through the City
There’s no one-size-fits-all answer to commuting — but the folding electric bike comes remarkably close. It offers freedom from timetables, flexibility in crowded cities, and a lifestyle upgrade that’s both eco-friendly and cost-efficient.
Models like the Fiido M1 Pro prove you don’t have to sacrifice power or comfort for convenience. With fat tires, long range, and foldable design, it’s built for real-life urban (and off-road) use.
So if you’re tired of sitting in traffic or waiting on unreliable transit, maybe it’s time to switch gears — and ride into the future, one folded frame at a time.
Data and information are provided for informational purposes only, and are not intended for investment or other purposes.
By Mitch Rice
Business growth is exciting for any entrepreneur, but it can also be taxing on the nerves. Things change at lightning–fast pace. Managing tasks such as hiring recruits, launching new products and services, exploring and assessing new markets, and analyzing rival strategies can be overwhelming. Amid all this, staying aligned—both internally and externally—becomes difficult. That’s where corporate video production steps in.
It is much more than a marketing tool in today’s business landscape. A well-crafted corporate video helps your growing venture scale up without facing many hurdles. With this tool, you can fulfill many business objectives. These include- connecting new teams, training recruits, maintaining a positive work atmosphere, and more. With the right strategy, corporate video production services can enhance your expansion efforts, addressing key aspects such as communication, culture, and customer trust.
Your company is expanding into newer markets and territories, and that feels great. However, amidst the growth, it is necessary to maintain brand consistency. Every new office, team, or partner must be clear about the company’s brand values, work culture, product offerings, and customer relations policies. Well-made corporate videos help your company achieve this balance across geographies. Your customers in San Francisco get the same experience and service quality as those in Vancouver, for example.
Is your company on an expansion track and hiring hundreds of employees for its existing and upcoming offices? That’s great, but onboarding them all manually can be time-consuming. Corporate video production helps you:
Employee onboarding videos can be reused, updated, and distributed as per your business needs. For the best experience, you must hire a reputed and experienced corporate video production San Francisco entity.
In any growing business, specific changes are inevitable. It may be related to work timing, the introduction of hybrid work, or switching from legacy tools to new cloud-based solutions, among other things. However, it is crucial to inform and enlighten the workforce about upcoming changes with clarity. This is where corporate videos shine better than printed documents and emails! Short, well-produced videos featuring company leaders make employees feel more connected and confident in the journey ahead.
As your business expands, the products or services may become more complex. Training hundreds of new sales professionals, customer service staff, and back-office staff can become taxing. Instead of repeating sessions, you can use product demo videos, how-to explainers, cloud solution walkthroughs, and customer service scenario clips. These videos can be adapted for regional or role-specific use, making company training efficient and scalable.
Businesses on a growth trajectory can benefit from utilizing a diverse range of corporate videos. These may include product demo videos, employee onboarding videos, client testimonials, culture videos, internal communications videos, and more.
Ensure you hire an expert and trusted corporate video production service provider for the best experience. Checking their client base and feedback will help you select a suitable contender.
Data and information are provided for informational purposes only, and are not intended for investment or other purposes.

All aboard for a legendary ride through Canadian music history! In 1970, Festival Express brought a trainload of musicians, unforgettable performances, and cross-country camaraderie to Canada. It’s been 55 years since the rails rang with jam sessions, laughter, and landmark concerts—and the legacy continues to inspire.
Festival Express: 55 Fun Facts to Celebrate 55 Years
Fifty-five years later, Festival Express still captures the imagination of music lovers and storytellers. From railcar jam sessions to spontaneous park concerts, it brought together some of the greatest talents of its era in a uniquely communal way. As we look back, we celebrate not just the performances, but the spirit of togetherness that made this journey legendary.

On this day in 1962, Canadian country legend Hank Snow released a song that turned maps into melodies and wanderlust into rhyme. “I’ve Been Everywhere” is a tongue-twisting anthem for sure, and it’s also a love letter to North America’s highways, backroads, and tucked-away towns, reimagined from Geoff Mack’s original Australian version.
The North American rewrite was brilliant. Armed with an atlas and a deadline, Mack swapped out place names for a whirlwind tour that begins on a “dusty Winnemucca road” and rockets through city after city, faster than a GPS recalculating on a country detour.
Snow’s rendition doesn’t just name-drop big cities like Chicago, Boston, and Houston—it swings through places you’ve driven past on summer road trips (Spirit Lake, Cadillac, Amarillo), spots you’ve meant to Google (Tocopilla, Chatanika), and ones you swear someone made up (Tallapoosa? Haverstraw? Jellico?). Six South American cities even sneak into the mix—Salvador, Barranquilla, Tocopilla, Argentina, Padilla, and Diamantina—just to keep your passport guessing.
Every verse is a high-octane itinerary: from Bangor to Bakersfield, Oskaloosa to Opelika, it’s a celebration of small towns, big dreams, and the geography of song. It’s also a challenge to any country fan with a memory—and lungs—strong enough to keep up.
So today, roll down the windows, turn up the volume, and take a musical road trip across North America. Because thanks to Hank Snow, geography has never sounded so fast—or so fun.
Ready? Here’s the places mentioned:
First verse
Reno, Chicago, Fargo, Minnesota, Buffalo, Toronto, Winslow, Sarasota, Wichita, Tulsa, Ottawa, Oklahoma, Tampa, Panama, Mattawa,[nb 2] La Paloma, Bangor, Baltimore, Salvador, Amarillo, Tocopilla, Barranquilla and Padilla.
Second verse
Boston, Charleston, Dayton, Louisiana, Washington, Houston, Kingston, Texarkana, Monterey, Ferriday, Santa Fe, Tallapoosa, Glen Rock, Black Rock, Little Rock, Oskaloosa, Tennessee, Hennessey, Chicopee, Spirit Lake, Grand Lake, Devil’s Lake and Crater Lake.
Third verse
Louisville, Nashville, Knoxville, Ombabika, Schefferville, Jacksonville, Waterville, Costa Rica, Pittsfield, Springfield, Bakersfield, Shreveport, Hackensack, Cadillac, Fond du Lac, Davenport, Idaho, Jellico, Argentina, Diamantina, Pasadena and Catalina.
Fourth verse
Pittsburgh, Parkersburg, Gravelbourg, Colorado, Ellensburg, Rexburg, Vicksburg, Eldorado, Larimore, Atmore, Haverstraw, Chatanika, Chaska, Nebraska, Alaska, Opelika, Baraboo, Waterloo, Kalamazoo, Kansas City, Sioux City, Cedar City and Dodge City.

Musical evolution is a beautiful thing. Some of the most beloved bands have embraced new sounds, taken risks, and reached exciting creative peaks. Here are 20 artists who made bold sonic shifts and continued soaring.
Arctic Monkeys
Arctic Monkeys started with the raucous indie rock of Whatever People Say I Am, That’s What I’m Not and surprised fans with the sultry, spacey lounge-rock of Tranquility Base Hotel & Casino. The shift revealed a band unafraid to take stylistic risks and lean into new lyrical narratives. Their continued evolution on The Car confirmed their embrace of cinematic storytelling.
Beck
Beck has always been a genre chameleon, but the jump from the lo-fi collage of Mellow Gold to the introspective beauty of Sea Change showcased remarkable artistic growth. Later albums like Colors and Hyperspace blended funk, pop, and future-leaning production with effortless flair.
Coldplay
From the heartfelt minimalism of Parachutes to the vibrant, electronic maximalism of Mylo Xyloto, Coldplay embraced experimentation without losing emotional resonance. Their recent album Music of the Spheres features collaborations with BTS and Selena Gomez, highlighting their global pop ambitions.
Fleetwood Mac
Fleetwood Mac transformed dramatically from their Peter Green-led blues roots into lush, harmony-driven rock with Rumours. The shift wasn’t just commercial; albums like Tusk pushed boundaries with experimentation, marking their legacy as sonic adventurers.
Genesis
Genesis evolved from progressive epics like Foxtrot and The Lamb Lies Down on Broadway to pop-forward hits on Invisible Touch. With Phil Collins leading the vocals, the band maintained complex musicianship while embracing melodic accessibility.
Green Day
Green Day’s journey from punk purists (Dookie) to rock opera auteurs (American Idiot) opened the door for a new generation of political and theatrical punk. They continued the momentum with 21st Century Breakdown, expanding their narrative ambition.
Imagine Dragons
Night Visions introduced Imagine Dragons’ arena-ready blend of alternative rock and electronic influences. As the years passed, albums like Evolve and Mercury – Act 1 embraced heavier synths and darker introspection, carving a space between indie and pop.
Kings of Leon
Kings of Leon evolved from the gritty Southern garage rock of Youth and Young Manhood to the grander soundscapes of Only by the Night, which brought them global fame with hits like “Sex on Fire”. Later albums like WALLS emphasized personal reflection and sonic polish.
Lady Gaga
Lady Gaga exploded onto the scene with the electro-glam of The Fame and later proved her musical versatility with jazz standards (Cheek to Cheek), stripped balladry (Joanne), and country-pop fusion. Chromatica returned to her dance roots with emotional gravity.
Maroon 5
Maroon 5 began with the soulful rock-pop of Songs About Jane, but shifted into sleek, radio-ready pop on Overexposed and Red Pill Blues. Their evolution showcases adaptability and a knack for crafting earworm melodies.
Metallica
From the thrash fury of Kill ‘Em All and Master of Puppets to the more polished, mid-tempo rock of The Black Album, Metallica broadened their appeal while maintaining their metal roots. S&M with the San Francisco Symphony marked a bold orchestral experiment.
Muse
Muse emerged with alt-rock intensity on Showbiz and ventured into dystopian, synth-heavy anthems on The Resistance and Simulation Theory. Their love of bombast, theatricality, and political themes runs strong through every transformation.
Panic! At The Disco
Starting with the baroque emo of A Fever You Can’t Sweat Out, Panic! At The Disco continually morphed across genres, embracing Queen-like grandeur on Death of a Bachelor. Their evolution reflects a love for showmanship and reinvention.
Paramore
Paramore matured from the energetic angst of Riot! to the emotionally rich alt-pop of After Laughter. Their latest release, This Is Why, blends funk, post-punk, and vulnerability, revealing a band always in motion.
Radiohead
Radiohead moved from the grunge-adjacent Pablo Honey to the genre-defying Kid A, which replaced guitars with glitchy synths and ambient textures. Albums like In Rainbows and A Moon Shaped Pool furthered their legacy of beautiful unpredictability.
Taylor Swift
Taylor Swift shifted from country roots (Fearless) to synth-pop dominance (1989) and stripped storytelling (folklore, evermore). Each reinvention brought new emotional palettes and poetic textures to her songwriting.
The 1975
The 1975’s eponymous debut delivered indie-pop charm, but each album since has pushed boundaries. From the experimental sprawl of A Brief Inquiry into Online Relationships to the refined intimacy of Being Funny in a Foreign Language, they continue to innovate.
The Beatles
The Beatles began with rock ‘n’ roll innocence on Please Please Me and journeyed through psychedelia (Sgt. Pepper’s), conceptual rock (The White Album), and introspective beauty (Abbey Road). Their evolution redefined what a band could become.
The Weeknd
The Weeknd evolved from the moody R&B of House of Balloons to the cinematic synth-pop of After Hours and Dawn FM. Each phase layered new emotional dimensions onto his unmistakable voice.
U2
U2 shifted from the raw passion of Boy and War to atmospheric beauty on The Joshua Tree and digital experimentation with Achtung Baby. Their ability to grow while maintaining core identity continues to resonate across generations.

In 2025, streaming is thriving, and music fans are more connected to artists than ever before. One of the best ways to build lasting momentum is through saves—those little taps that tell the algorithm and your fans that your song matters. Here’s how to encourage your audience to make that save button part of their music routine.
1. Ask With Excitement
Inviting fans to save your song works best when it comes from a place of genuine joy. A quick message that says, “It would mean the world if you saved this track!” adds heart and builds connection.
2. Use Eye-Catching Visuals
Create simple graphics or short videos that show how to save your song. Fans love content that’s vibrant and helpful, especially when it fits your vibe.
3. Pin the Link Everywhere
Keep your song’s link at the top of your bios, in your pinned tweets, and at the forefront of your Linktree or website. Easy access makes it easy for fans to show support.
4. Highlight What a Save Does
Let fans know that saving helps your song get featured in playlists and shared with new audiences. It’s a small act with a big impact—and fans love knowing they’re part of your journey.
5. Celebrate the First 100 Saves
Share milestones with your audience: “100 saves already! You’re amazing!” This encourages fans to join in on the celebration and keep the energy flowing.
6. Create a Countdown Moment
In the days leading up to release, include “Don’t forget to save it!” in your countdown posts. It builds anticipation and makes saving part of the launch experience.
7. Make Saving a Shared Experience
Invite fans to screenshot themselves saving your track and tag you. Repost with gratitude and good vibes. It turns your release into a community moment.
8. Include the Save in Pre-Save
Set up a pre-save campaign that automatically adds your song to fans’ libraries. They’ll be happy to wake up to your new track already waiting for them.
9. Add Personality to Your CTA
“Saving this song might bring good luck (or at least good music)” is more fun than a plain request. Fans enjoy a little charm with their calls-to-action.
10. Say Thank You Often
Every save is a sign of support. Thank your fans regularly, both in posts and in person. Gratitude builds a strong bond—and strong bonds build long-term fans.
Songs are traveling faster and farther than ever—but it all starts with one listener hitting “save.” When you bring your fans into the story and make saving feel meaningful, you turn one small action into big momentum. Keep making music. Keep sharing it with heart.
By Mitch Rice
You’ve been dreaming about standing beneath the shadow of the world’s tallest mountain, camera in hand, breath caught between excitement and altitude. But before you take that first step toward Everest Base Camp, there’s a lot more to prepare for than just sturdy boots and good intentions.
Trekking to Everest Base Camp isn’t just a bucket-list hike—it’s a physical and mental journey through high-altitude terrain, unpredictable weather and a culture vastly different from your own. Many first-time trekkers underestimate what it really takes to reach Base Camp safely and enjoyably. From avoiding altitude sickness to packing the right gear and choosing the best time to go, each detail can make or break your adventure.
That’s why we’ve put together the top 10 things to know before trekking to Everest Base Camp—so you’re not caught off guard on the trail. Whether you’re wondering about logistics, health, gear or local customs, this guide will give you practical insights to help you trek smarter, safer and more confidently. Let’s get you ready before you ever lace up your boots.
The classic Everest Base Camp trek starts with a short flight from Kathmandu to Lukla. From there the trail goes through traditional Sherpa villages like Phakding, Namche Bazaar, Tengboche and Dingboche before reaching Everest Base Camp at 5,364 meters.
Most standard itineraries take 12 to 14 days round trip from Lukla. This includes two key acclimatization days—usually in Namche Bazaar and Dingboche—to help your body adjust to the increasing altitude. The final push to Base Camp starts from Gorakshep and the next morning you’ll hike to Kala Patthar for sunrise views of Mt. Everest.
The return journey retraces your steps back to Lukla. Most trekkers find the descent faster and easier but it’s still physically demanding. Each day involves 5–7 hours of walking with plenty of scenic stops.
How long does it take to trek to Everest Base Camp? Well that depends on your fitness, pace and acclimatization needs—but two weeks is the average.
The Everest Base Camp trek is moderately difficult. You don’t need mountaineering skills but a good fitness level is required. The real challenge is the altitude—not the terrain.
The trail has gradual ascents, rocky paths and occasional steep climbs especially before Namche and Tengboche. You’ll gain significant elevation over multiple days which can lead to breathlessness or fatigue. Some trekkers also struggle with the thinner air above 4,000 meters.
You won’t need technical climbing gear but you should be comfortable walking several hours daily for multiple days in a row. A loaded backpack and unpredictable weather can add to the difficulty.
Proper acclimatization is key. Trekkers who try to rush the itinerary or skip rest days are more prone to altitude sickness. That’s why planning a slower, well-paced trek is crucial to reach Base Camp safely.
If you’re reasonably fit, mentally prepared and respectful of the altitude the Everest Base Camp trek is a rewarding challenge—not an impossible one.
Altitude sickness or Acute Mountain Sickness (AMS) can affect anyone trekking to Everest Base Camp—regardless of fitness or experience. As you ascend above 2,500 meters the oxygen level in the air decreases significantly. This puts stress on your body, especially your lungs and brain.
Common AMS symptoms are headache, nausea, dizziness, loss of appetite and difficulty sleeping. These usually appear within 6–24 hours after gaining elevation. If ignored, AMS can escalate into serious conditions like HAPE (fluid in the lungs) or HACE (swelling in the brain), both of which are potentially fatal.
Symptoms of HAPE are breathlessness at rest, cough and chest tightness. HACE may cause confusion, poor coordination or hallucinations. These signs require immediate descent and medical attention.
Altitude sickness is a leading cause of failed EBC treks. Many people turn back because they ignore early symptoms or ascend too quickly. Recognizing AMS early and acting fast is critical for your safety.
The best way to prevent altitude sickness on the Everest Base Camp trek is to acclimatize properly. Follow the “climb high, sleep low” rule and don’t gain more than 500 meters in sleeping altitude per day above 3,000 meters.
Plan your itinerary to include at least two acclimatization days—usually in Namche Bazaar and Dingboche. Use these days to hike higher during the day and return to sleep at a lower elevation. This helps your body adjust gradually.
Stay hydrated. Drink 3–4 liters of water daily and avoid alcohol and tobacco which can worsen symptoms. Eat regularly even if you lose your appetite. Caloric intake helps your body cope with the altitude.
Diamox (acetazolamide) is a commonly used medication to prevent and reduce AMS symptoms. Consult your doctor before the trek to see if it’s right for you. Some trekkers start taking it a day before ascending above 3,000 meters.
If symptoms become severe don’t try to “push through.” Descending even 500–1,000 meters can make a huge difference. There are also evacuation services available via helicopter but these are expensive without travel insurance.
Respecting altitude is non-negotiable. Trekking slowly, listening to your body and prioritizing safety will help you reach Everest Base Camp without unnecessary risk.
The best time to trek to Everest Base Camp is either in spring (March to May) or autumn (late September to November). These seasons offer the most stable weather, clear skies and excellent views of the mountains.
Spring is especially popular because of blooming rhododendrons and moderate temperatures. It’s also climbing season so you may meet Everest expedition teams along the way. Autumn after the monsoon rains brings crisp air and unmatched mountain clarity.
Daytime temperatures are pleasant especially in lower elevations. Higher up it can get chilly but the weather tends to be dry and predictable. These months also have the most reliable flight schedules between Kathmandu and Lukla.
If you’re aiming for the best time for an Everest Base Camp trek, aim for mid-October or late April for the perfect balance of weather and fewer crowds.
Winter (December to February) and summer monsoon (June to early September) are off-seasons for the EBC trek—and for good reason.
During winter temperatures at higher elevations can drop below -20°C at night. Snow can block trails and passes especially around Gorakshep and Kala Patthar. While it’s less crowded the extreme cold can be brutal without high-end gear.
Monsoon season brings heavy rain, landslides and poor trail conditions below Namche Bazaar. Lukla flights are frequently delayed or canceled due to low visibility. Leeches are also a common nuisance in the lower forested areas.
These off-season risks increase both physical and logistical challenges. Trekking is still possible with proper preparation but it’s not ideal for first-timers.
If you’re planning your Everest Base Camp adventure, timing it right can make the difference between an enjoyable experience and a tough one. Stick with the high seasons unless you’re very experienced or seeking solitude with added risk.
To trek to Everest Base Camp you’ll need two main permits: the Sagarmatha National Park Permit and the Khumbu Pasang Lhamu Rural Municipality Permit.
The Sagarmatha National Park Permit allows you to enter and hike within the park boundaries which start just before Monjo. It’s issued by the Nepal Tourism Board (NTB) and is required for all trekkers heading towards Base Camp.
The Khumbu Rural Municipality Permit replaced the old TIMS (Trekkers’ Information Management System) card in this region. It’s collected by the local government in the Khumbu area to support community development and tourism management.
These permits are non-negotiable and regularly checked along the trail. If you’re stopped without one you’ll be fined or sent back.
Together these permits ensure your trek to Everest Base Camp is legal, safe and supportive of the local economy.
Both Everest Base Cmap trek permits are easy to obtain either in Kathmandu or on the trail.
You can get the Sagarmatha National Park Permit at the Nepal Tourism Board office in Kathmandu or at the Monjo checkpoint near the park entrance. It costs NPR 3,000 for foreigners (approx. USD $25).
Khumbu Rural Municipality Permit
Buy this permit in Lukla at the permit counter just outside the airport. It costs NPR 2,000 per person (approx. USD $15–17) for the first four weeks.
Take your passport and two passport-sized photos when applying in Kathmandu. If you’re trekking with an agency, they will arrange everything for you.
Keep both permits with you at all times. You’ll show them at multiple checkpoints on the way to Everest Base Camp.
Packing well makes the EBC trek so much more comfortable. Layers are key—temperatures can drop from sunny to freezing in minutes.
Bring moisture-wicking base layers, insulated jacket, waterproof shell, trekking pants, warm hat and gloves. Quality hiking boots (broken in beforehand) and camp shoes are essential.
Other must-haves: headlamp, trekking poles, sunglasses, refillable water bottle or hydration bladder. Don’t forget water purification tablets or SteriPEN—bottled water is expensive and wasteful.
Sleeping bag rated to -10°C or lower for high-altitude nights. Basic first-aid kit, sunscreen, lip balm, personal hygiene items (wet wipes).
Pack light but smart. Every gram counts at altitude.
If you’re on a budget or not planning to trek again soon, renting gear in Kathmandu is a good option. You’ll find dozens of shops in Thamel offering down jackets, sleeping bags and trekking poles for a few dollars a day.
But quality varies. Renting is fine for bulky items like sleeping bags, but invest in well-fitting boots, base layers and backpack. These are worth buying new.
Check rented items for tears or broken zippers before heading out. And note: gear must be returned clean and on time to avoid extra fees.
Buying gear is better for frequent trekkers. But for one-time visitors, Kathmandu rentals keep your luggage light and your wallet happy.
Tea houses are local guesthouses that provide basic lodging and meals throughout the trek. Rooms are twin-sharing with plywood walls, shared bathrooms and minimal insulation.
No heating in rooms. Warmth comes from thick blankets or your own sleeping bag. Dining halls have a yak dung-fueled stove, so they’re the coziest spot.
As you go higher, accommodations get more basic. In Gorakshep and Lobuche, rooms are small and unheated and hot showers are limited or non-existent.
Still, tea houses are an experience. You’ll meet trekkers from around the world and enjoy warm Sherpa hospitality every night.
Menus are surprisingly varied, especially in lower villages. Dal Bhat (rice, lentils and vegetables) is the staple meal—nutritious and all-you-can-eat.
Other options include fried rice, pasta, potatoes, noodles, pancakes and momos (dumplings). Meat is available in some places but avoid it above Namche due to freshness concerns.
Tea houses also offer hot drinks like masala tea, lemon ginger honey and instant coffee. Bottled water and soft drinks are available but get pricier with altitude.
Bring snacks like nuts, energy bars and electrolyte powder. Food keeps your energy up and having your favorites on hand makes a big difference on tough days.
You can trek to Everest Base Camp without a guide if you’re experienced and confident with maps and logistics. The trail is well-marked and villages are frequent.
But hiring a guide enriches the experience. They offer local insights, cultural context and support in emergencies. They also help with permits, flights and accommodation.
A porter carries your heavy pack so you can enjoy the hike without physical strain. Especially at high altitude.
If it’s your first time trekking in Nepal or at altitude, a guide or guide-porter is highly recommended. It reduces stress and adds safety.
Rates vary but generally guides cost $25-35 per day and porters $15-25 per day. This includes their food, accommodation and insurance.Many trekking agencies offer packages with guide and porter services included. If hiring independently, make sure they are licensed and insured.
Tipping is customary: $5-10/day for porters and $10-15/day for guides depending on performance.
Hiring support also creates local employment. By bringing a guide or porter you’re directly contributing to Nepal’s mountain communities.
You don’t need to be an athlete but you do need decent fitness. Expect to walk 5-7 hours daily for nearly two weeks.
Train with hikes on uneven terrain, especially with a loaded backpack. Focus on cardio, strength and endurance. Stair climbing, cycling and long walks also help.
The altitude is more demanding than the distance. Even fit people struggle if they ascend too quickly. Acclimatization is more important than speed.
Start training 2-3 months in advance. The fitter you are the more enjoyable your trek will be.
The Everest Base Camp trek isn’t just physically demanding—it’s mentally tough too.
Expect cold nights, basic toilets, long uphill climbs and days without Wi-Fi. Staying positive and flexible makes all the difference.
Mental prep includes researching the route, understanding altitude risks and embracing discomfort. Trekking with others helps keep morale up during tough stretches.
Remind yourself why you’re doing it. The journey is as rewarding as the destination.
Connectivity has improved along the Everest Base Camp route but it’s far from perfect.
Ncell SIM cards work up to Namche Bazaar and patchy beyond. Everest Link Wi-Fi is available in most tea houses for a fee (NPR 500-800 for 24 hours).
Expect slow speeds and outages especially during bad weather. Don’t rely on internet for navigation or emergency use.
Download offline maps and tell family you’ll be semi-offline. A break from the digital world can be refreshing.
There are no ATMs after Namche Bazaar. Bring all cash in Nepali rupees before you start the trek.Plan for NPR 3,000-5,000 per day depending on your spending habits. This covers food, accommodation, Wi-Fi, hot showers and snacks.
Higher up prices double or triple due to transport costs. A bottle of water that’s NPR 50 in Kathmandu can cost NPR 400 in Gorakshep.
Carry your cash in small denominations and keep it secure. Credit cards are useless on the trail.
The Everest region is home to the Sherpa people, whose culture is deeply rooted in Tibetan Buddhism.
Always walk clockwise around mani stones and stupas. Don’t touch prayer flags or spin prayer wheels in the wrong direction.
Dress modestly. Even though you’re trekking, shorts and sleeveless tops can offend locals in villages and monasteries.
Ask before taking photos of people, especially monks. And always remove your shoes before entering religious sites.
Respecting the environment is just as important as respecting culture.
Pack out all non-biodegradable waste. Avoid plastic bottles—use water purification instead. Stick to established trails and avoid picking plants or disturbing wildlife.
Support the local economy. Stay in local tea houses, hire local staff and buy from village shops when possible.
Your trek to Everest Base Camp isn’t just about reaching a destination—it’s about doing so with respect, humility and care for the land and people who call it home.
Trekking to Everest Base Camp is an adventure like no other—but it’s one that rewards preparation as much as perseverance. From understanding the route and respecting the altitude to packing smart and embracing the local culture every detail adds to a safer and more meaningful experience.
Whether you’re just starting your research or finalizing your gear list these ten tips are here to guide you through. The trail will test you but it will also inspire you in ways few places on Earth can.
Have questions or a tip from your own trek? Drop it in the comments—we’d love to hear from fellow adventurers. And if you found this guide helpful consider sharing it with a friend planning their EBC trek.
Data and information are provided for informational purposes only, and are not intended for investment or other purposes.
Follow us on Instagram @thatericalper

Eric Alper is a 6-time nominee for Publicist of the Year during Canadian Music Week and has overseen the publicity campaigns for over 183 JUNO Award-nominated albums (and 16 in 2025), 45 Grammy-nominated albums, including 47 JUNO Award, 58 Canadian Folk Music Award, 126 Maple Blues Award-winning albums and is also truly honoured to work with some of the biggest and most important artists of our time.
Contact me: eric@thatericalper.com
© Copyright - That Eric Alper